Food and Garden Dailies started as a way to record my family's favorite recipes. It has come in handy many times when I'm asked for a recipe. I simply email a link to the blog! But I couldn't just stick to recipes. The kitchen is tied to the garden in so many ways...and so I let you into my ever changing garden as well.

If you're interested in my all-time favorite recipes, check out this post first: My Favorite Recipes

Monday, March 28, 2011

Project Simplify Week 4: Cleaning out the Pantry and Fridge

Pin It For the past few weeks I've been participating in an on-line challenge.  It's from Simple Mom and we're just starting week 4.  Each Monday, for five weeks, a challenge is announced This week's challenge is to clean out the fridge and pantry.  Past weeks' challenges have been cleaning out closets and dressers, getting control of the paper clutter, and organizing kids' toys and clothing.

Every Monday I enjoy getting on-line to check out the new challenge.  Most folks are putting their before/after pics and stories on their blogs.  Since this challenge is directly related to the kitchen, I'll post this week's results as well.

We have two refrigerator/freezers and one upright freezer.  And a pantry.  Thankfully my upright freezer is brand-spanking new and organized to the hilt.  Same with the top freezer space in the garage.  The outside fridge needs some major wipe downs.  It does get neglected.  I thought the inside fridge was in pretty good shape.  Oh, no.  I was dreadfully wrong.  Lots of gunk stuck to the shelves.  Outdated dressings.  A few leftover containers past their prime.  And then...the dusty guk behind the vent.  Oh, my.

My pantry is in decent shape.  But I've strayed from putting my dry goods in Tupperware Modular Mates containers lately.  I've been meaning to get back on track with that, so I'm thankful for the challenge.  I will be the first to admit I'm a bit compulsive about sealing all my cereals and snacks and flour, etc. in Tupperware.  But...it has saved me a ton of $$ when we've had critter infestations.  Yeah, that's the stuff no one wants to talk about.  But as clean as our kitchen is, we've been attacked by some sort of weird bug that multiplied (South Carolina), ants (South Carolina and Oregon), and mice (Oregon).  The first time we threw out hundreds of dollars of food because of bugs.  When Tupperware had a 50% off sale on Modular Mates I became a consultant and bought a bunch!

Anyhow...back to the challenge.   Here are my before pics.  I DID get my kitchen freezer/fridge completed so I have some after shots as well.  I'll post more as I progress with the challenge.

Want to join in?  Start this week with the fridge/freezer and pantry.  Then check in next Monday to see the final challenge.
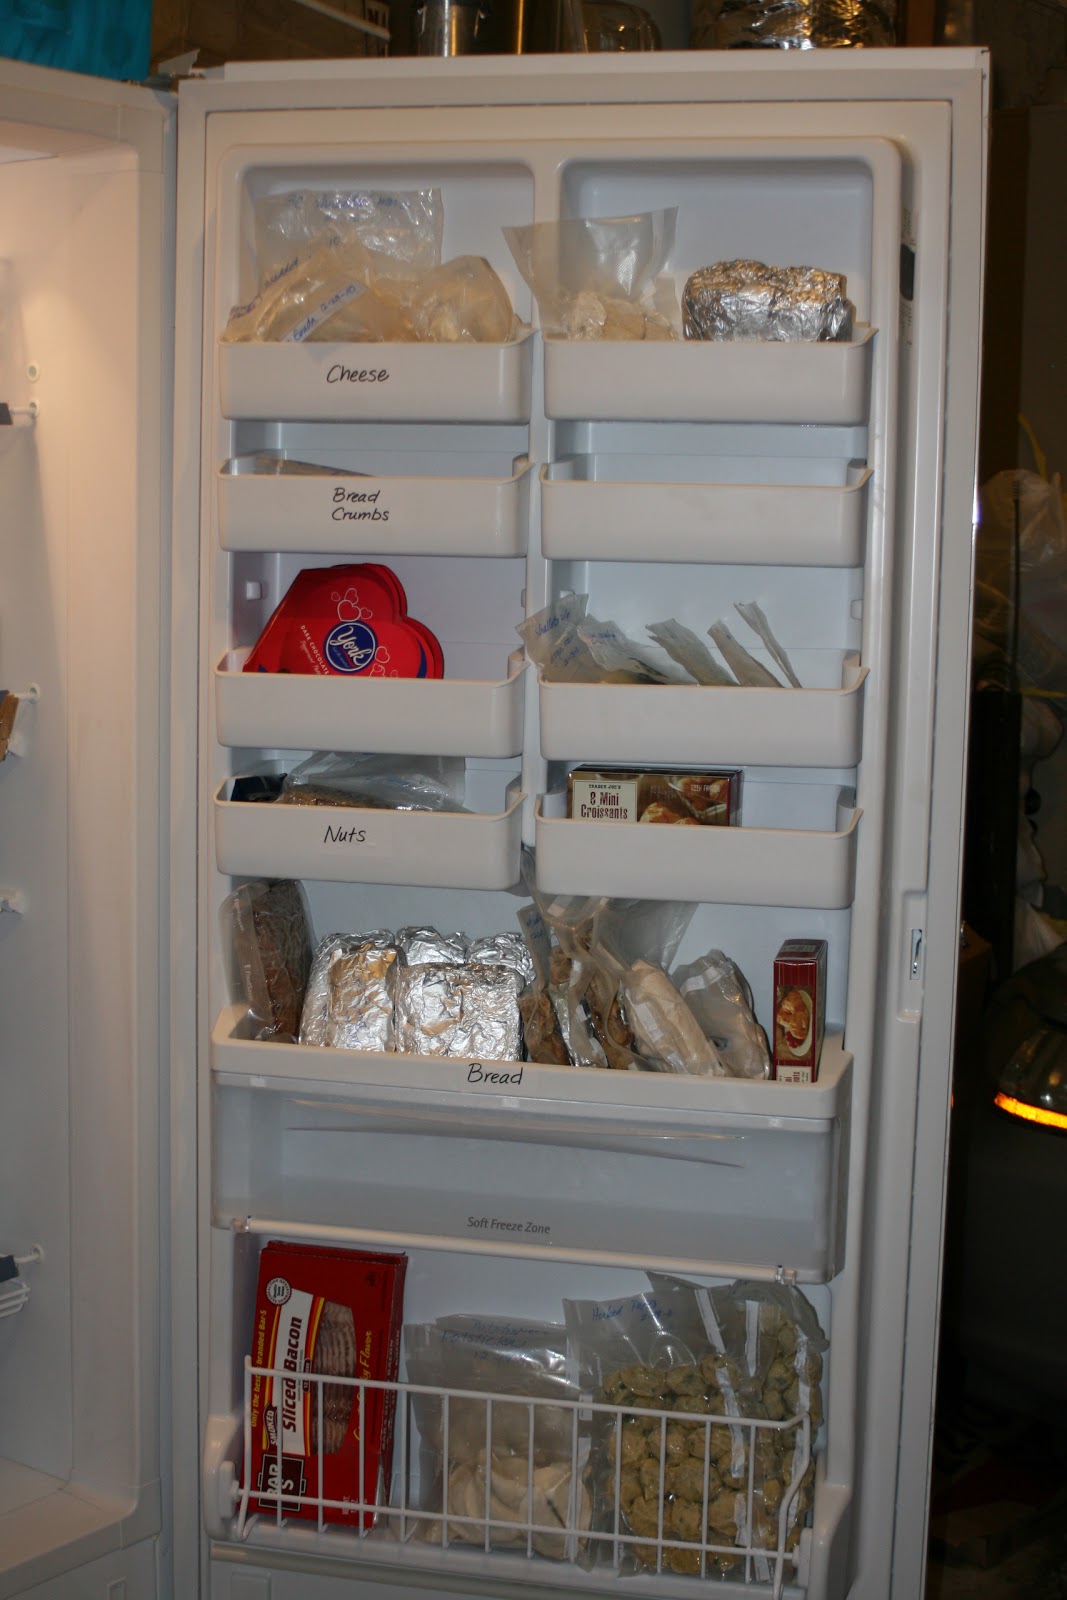
Kitchen Freezer:


Kitchen Fridge Door:
(Look!  All the mustards are together! Salad dressings too!)

Kitchen Fridge:
(I know it looks a bit sparse!  I purposely chose to do this task before a big grocery trip.)
 

Left Wall of Pantry:
(All before)


 Pantry Shelves (Before):


Pantry Shelves (After Pics):  COMING SOON!

Thursday, March 24, 2011

Creamy Baked Four-Cheese Pasta

Pin It
It's no secret that I'm a huge fan of Cook's Illustrated.  My husband is a fan of pasta and cheese.  I mean, what's not to like?  On one of my busy nights, he took control of shopping and dinner and treated the family to this cheesy pasta dish.  Definitely a crowd pleaser!!  And, oh, so simple. 

Creamy Baked Four-Cheese Pasta
(Cook's Illustrated)

Topping

In a food processor, process with the steel blade until coursely ground:
     4 slices white sandwich bread, torn up
     2 TB melted unsalted butter

Toss with
     1/4 C grated Parmesan cheese

Set aside.

Pasta and Cheese

Heat the oven to 500 degrees.

Cook until al dente:
     1 lb penne pasta
When finished, drain, return to poss and toss with:
     1 TB olive oil

Melt:
     2 tsp unsalted butter

Add to the butter, stirring until golden, about a minute
     2 tsp all-purpose flour

Whisk in and bring to a simmer:
     2 C heavy cream
Whisk frequently until it's thickened.

Remove from heat and add:
     1/4 tsp salt
     1/4 tsp pepper
Cover to keep warm.

Combine in a large bowl:
     4 oz shredded fontina cheese (about 1 1/3 C)
     3 oz crumbled Gorgonzola cheese (about 3/4 C)
     1 oz grated Pecorino Romano cheese  (about 1/2 C)
     1/2 oz grated Parmesan cheese (about 1/4 C)

Add the cooked pasta to the cheese and pour in the hot creamy mixture.  Cover and let sit for three minutes.  Remove cover and mix until the cheeses are melted and all ingredients are combined.  Place in a 9 x 13" baking dish, and sprinkle with the bread topping.  Bake until the topping is golden brown, about 5-10 minutes.  Serve immediately.

Variations:

1)  Add a  14.5 oz. can of drained, diced tomatoes to the pasta when you add the creamy mixture.    Add 1/4 C chopped fresh basil just before you put it in the baking dish.

2)  Skip the salt and instead add 4 oz chopped prosciutto and 1 C frozen peas to the pasta when you add the creamy mixture.

Tuesday, March 22, 2011

Chicken Cordon Bleu

Pin It
A few years ago I purchased the cookbook, Don't Panic- Dinner's in the Freezer, which had some pretty decent reviews.  I liked the variety of the recipes as well as the format.  The recipe page features a simple chart for a single batch, x3, x6, or x9....perfect for large batch cooking.  Not too long ago, a companion book came out, Don't Panic-  More Dinner's in the Freezer.  Some good reviews led me to purchase that as well.  (I know, I know....there are too many cookbooks to begin with in our home!!).  This book's been sitting up on the shelf, getting ignored as I pass it by for Cook's Illustrated recipes.  Poor thing!  A few weeks ago, I dusted it off and tried the first recipe.

The Chicken Cordon Bleu was pretty darn good.  Simple flavors, easy to make. 

Chicken Cordon Bleu
(Don't Panic-  More Dinner's in the Freezer)

Yield:  4 servings

Fill one shallow bowl/dish with:
      1/2 C flour
     1 TB paprika

Fill one shallow bowl/dish with:
     1 beaten egg

Fill one shallow bowl/dish with:
     1/2 C plain breadcrumbs (fresh or dried would both work)

Pound to uniform thickness, about 1/4" thick*
     4 large boneless, skinless chicken breast halves

Top each breast with
     1-2 slices of ham
     2 thin slices of Swiss cheese
     A dollop of the Bechamel sauce**

Roll up each chicken breast, and secure with a toothpick.  Dip the chicken piece in the flour, then the egg, and then the breadcrumbs, rolling each time to cover completely.

Heat a skillet with a bit of oil and brown all sides of the chicken.  Place browned chicken on a baking sheet.  Flash freeze. Once frozen solid,  freeze individual or family sized servings in a freezer bag, removing as much air as possible.  Or vacuum pack, which is my preferred method.

To serve:  Completely defrost chicken.   Bake in a 375 degree oven until done (25-30 min.).   Pour thawed Bechamel sauce* over chicken for the last 5 minutes of cooking.

*You can pound the breasts and make pretty little spirals, or you can take a shortcut like I did.  Make a slit inside the chicken breast and fill with the cheese, ham, and sauce.  Works just fine!

You can see how the sauce on top is a bit grainy.  Make that fresh instead!
**The Bechamel sauce is supposed to be made ahead.  Some of it goes into the chicken, and the rest is divided into little baggies, frozen, and defrosted to pour over the chicken at the end of the end of the cooking cycle.  The milk-based sauce doesn't freeze very well.  It takes on a lumpy, grainy texture once frozen.  It still adds flavor, and I'd rather make it with the frozen sauce than without.  

The consistency of the sauce that's placed inside the chicken  isn't as noticeable as the sauce poured on top.  I would continue to make some sauce ahead, and place it inside the chicken.  Then I'd also make up a bit of this sauce on eating day and not freeze it.  I always have butter, milk, and flour on hand.  I don't always have Swiss cheese though.  So the next time I make this, I'll put a bit of Swiss in a baggie, pack it with the chicken, and add fresh sauce on top.

Wednesday, March 16, 2011

Lentil-Barley Burgers

Pin It
Since the girl declared herself a vegetarian 4 years ago, we've been on the hunt for flavorful, kid-friendly vegetarian recipes.  It's so easy to just pop a frozen chik patty or a veggie burger in the toaster oven, and at times we do rely on them.  But my goal is to have a variety of healthy, home-made, frozen vegetarian foods on hand for the girl's meals.  This lentil-barley burger is perfect!

Lentil-Barley Burgers
(Cooking Light)

Use leftover cooked pearl barley with lentils, veggies, and seasonings for a hearty main-dish burger sans the bun. Fruit salsa adds bright flavors. Serve with lime wedges for added zest.
Total: 2 hours
Yield: 4 servings (serving size: 2 patties and 1/4 cup salsa)

Ingredients

  • 1 1/2  cups  water
  • 1/2  cup  dried lentils
  • Cooking spray
  • 1  cup  chopped onion
  • 1/4  cup  grated carrot
  • 2  teaspoons  minced garlic
  • 2  tablespoons  tomato paste
  • 1 1/2  teaspoons  ground cumin
  • 3/4  teaspoon  dried oregano
  • 1/2  teaspoon  chili powder
  • 3/4  teaspoon  salt, divided
  • 3/4  cup  cooked pearl barley
  • 1/2  cup  panko (Japanese breadcrumbs)
  • 1/4  cup  finely chopped fresh parsley
  • 1/2  teaspoon  coarsely ground black pepper
  • 2  large egg whites
  • 1  large egg
  • 3  tablespoons  canola oil, divided

1. To prepare burgers, combine 1 1/2 cups water and lentils in a saucepan; bring to a boil. Cover, reduce heat, and simmer 25 minutes or until lentils are tender. Drain. Place half of lentils in a large bowl. Place remaining lentils in a food processor; process until smooth. Add processed lentils to whole lentils in bowl.

2. Heat a large nonstick skillet over medium-high heat. Coat pan with cooking spray. Add onion and carrot; sauté 6 minutes or until tender, stirring occasionally. Add garlic; cook 1 minute, stirring constantly. Add tomato paste, cumin, oregano, chili powder, and 1/4 teaspoon salt; cook 1 minute, stirring constantly. Add onion mixture to lentils. Add remaining 1/2 teaspoon salt, barley, and next 5 ingredients (through egg); stir well. Cover and refrigerate 1 hour or until firm.

3. Divide mixture into 8 portions, shaping each into a 1/2-inch-thick patty. Heat 1 1/2 tablespoons oil in a large nonstick skillet over medium-high heat. Add 4 patties; cook 3 minutes on each side or until browned. Repeat procedure with remaining 1 1/2 tablespoons oil and 4 patties.

Cooking Light published a recipe for Fiery Fruit Salsa to serve with the burgers.  Here's that recipe as well:

Fiery Fruit Salsa
(Cooking Light)

Mis together, cover, and refrigerate:
  • 1/4  cup  finely chopped pineapple
  • 1/4  cup  finely chopped mango
  • 1/4  cup  finely chopped tomatillo
  • 1/4  cup  halved grape tomatoes
  • 1  tablespoon  fresh lime juice
  • 1  serrano chile, minced

Nutritional Information :

Serving Size:  2 patties, 1/4 cup Salsa;  Calories: 315;  Fat:  12.8g (sat 1.2g,mono 6.8g,poly 3.5g);  Protein:  12.8g:  Carbohydrate:  39.2g;  Fiber:  9.5g;  Cholesterol:  53mg;  Iron:  3.9mg;  Sodium:  539mg;  Calcium:  60mg

Tuesday, March 15, 2011

How to Get Rid of Fruit Flies

Pin It
I really don't want or need to know where fruit flies come from.  They just magically materialize when fruit starts to rot.  They multiply like rabbits. Actually, I think they multiply faster than rabbits.  To get rid of them, you really have to stay on top of them and not let them get out of control.

When I first spy one, I quickly check my produce bowl.  Usually I just have to tap it, and a fruit fly or two (hopefully that's all....) will fly out.

Over the years I've tried different methods to get rid of them.  Slapping them together between two damp pieces of paper towel was the most fun and actually pretty darn effective.  It did take some time though, and I'm sure I looked quite foolish.

So when the last bout of fruit flies began, I started Googling to find out easier ways to get rid of them.  There's a lot of information out there.  Capturing them in a container with bait is a common theme.  But do you just poke holes in the container lid or do you make a cone-shaped funnel for them to enter?  Do you put rotting fruit, juice, apple cider vinegar, dish soap,  balsamic vinegar, or white wine and coriander seeds in the container as bait?  Do you suck them up with a vacuum cleaner attachment?

I tried a few things and quickly learned that more flies go to the cone-shaped funnel than to a random hole poked in a lid.

Going back to my science fair days, I set out three jars fitted with cone-shaped funnels.  One had a rotten piece of fruit, one had apple cider vinegar (seemed to be recommended most), and one had the fruit and the vinegar.   I placed the jars right near the source...the fruit bowl.

Those little bugger found my jars pretty darn quickly.  The most effective jar was the one with plain old apple-cider vinegar.  It caught twice as many flies as the other jars.  And it looked a whole lot better!  So, if you're looking to get rid of fruit flies, get a jar, a coffee filter, some tape, apple-cider vinegar, and a pokey-stick.


Fold the filter in quarters.

Put a few inches of apple cider vinegar in the jar.
Place the coffee filter in the jar, as shown.
With the cone inside, fold the top of the filter over the edge of the jar.  Tape in place, and poke a hole at the bottom of the cone.

Place the jar near your food source and wait for the fruit flies.  Change out the jars each day.  It's kinda' icky looking at floating fruit flies.  

Monday, March 14, 2011

Key Lime Pie with Meringue Topping

Pin It

Today is 3.14.  Pi Day.  Or Pie Day.   How will you be celebrating?  In honor of Pi Day, here's one you might like to try:  some good ol' southern Key Lime Pie.

Before we get to the recipe, we'll be taking a brief detour through the Low Country of South Carolina.  While living in the Low Country,  we were introduced to many regional foods, events,  and customs.

One of my first memories was when we'd just moved there.  My neighbor, Teresa, invited me to go with her to the Loris Bog Off.  Now Loris  is this dinky little town in Horry (that's OH-reeeee) County with about 2,000 residents.  Once a year, the town swells to 30,000 with its annual festival featuring chicken bog.  For those of you not in the know, a Bog-Off is much like a Chili Cook-Off.  Chefs prepare their own unique recipes of chicken bog and enter it in a contest.

I'd never heard of chicken bog until I moved to South Carolina.  And, like chili, there are umpteen recipes and variations.  The basics are rice (staying true to the low-country's heritage), sausage, chicken, onions, and broth.  The dish is as local as you can get. And Loris is as famous as Loris will ever be with the annual Bog-off.

Anyhow, as we're wandering around the streets of Loris I saw this group of men in suits with an old man who was going around shaking hands with everyone.  He made his way to Teresa and me, and shook our hands too.  As he walked away I learned I just shook hands with the country's oldest and longest serving US Senator:  Strom Thurmond.  He was 94 years old and campaigning for his last election.

During our five years in the Low Country, we also had the opportunity to try benne wafers, boiled peanuts, greens, grits (instant not allowed), she-crab soup, chitlins (thankyouverymuchbutiwillpassonthese),barbecue (simply called barbecue, it's vinegar-based barbecued pork) , and of course, fried chicken smothered with gravy (OK...everything was smothered in gravy!).  Coming from the west, this was a whole new world of food.

And how do you properly top off a Low Country meal?  Key Lime pie, of course!  It's another regional favorite, though not strictly Low-Country.  Oh, my.   The Southerners do know their pie!

So, in honor of Pi Day, I will share with you Paula Deen's Key-Lime Pie with Meringue Topping.

Key Lime Pie with Meringue Topping
(Paula Deen)

Pie:

1 prepared 9-inch graham cracker crust (I used Keebler brand)
1/2 C heavy cream
1/2 C freshly squeezed lime juice
2 tsp grated lime zest
1 (14-ounce) can sweetened condensed milk
3 large egg yolks

Meringue:
4 egg whites
6 TB sugar
1/2 tsp cornstarch
pinch of salt

Preheat the oven to 350 degrees.
In a medium bowl, whisk together the egg yolks and condensed milk. Stir in the lime zest, lime juice, and cream. Pour the filling into the crust and bake about 30 minutes or until firm. Remove pie from oven.
Meanwhile, in a medium bowl beat the egg whites until soft peaks form. In a second bowl, stir together the sugar, cornstarch, and salt. Add the sugar mixture, a little at a time, to the egg whites, beating between additions. Continue to beat until the sugar dissolves. Spoon the meringue over the hot pie filling. Torch the meringue to give it’s golden color; or bake for 10 to 12 minutes. Serve pie warm or at room temperature. 
 
 And, just to be clear, as Paula Deen states, "Key Lime Pie should never be green!" 

Sunday, March 13, 2011

Pi Pie for Pi Day!

Pin It Are you ready for Pi Day?  3.14.  March 14....It's tomorrow!  In honor of Pi Day we made these Pi Apple Pies:


Want to make your own Pi Pie?  Here are a few of my favorite pie recipes:


Flaky Buttermilk Biscuits

Pin It
I've been meaning to try these biscuits for awhile now.  Every time I think of making them, I can't because I don't keep buttermilk on hand.  I know there are substitutes, but when I'm making a recipe for the first time, I like to make it the way it was written.  Anyway, once I finally remembered to buy some buttermilk, our family loved these!  They're a bit more work (especially when compared to those that pop out of cans....) but so worth it.  And, the dough can be frozen.  I made up a couple batches and put some in the freezer for another time.


Flaky Buttermilk Biscuits
(Cook's Illustrated)

The dough is a bit sticky when it comes together and during the first set of turns. Set aside about 1 cup of extra flour for dusting the work surface, dough, and rolling pin to prevent sticking. Be careful not to incorporate large pockets of flour into the dough when folding it over. When cutting the biscuits, press down with firm, even pressure; do not twist the cutter. The recipe may be prepared through step 2, transferred to a zipper-lock freezer bag, and frozen for several weeks. Let the mixture sit at room temperature for 15 minutes before proceeding.

Makes 12 biscuits

2 1/2 cups unbleached all-purpose flour (12 1/2 ounces), plus additional flour for work surface
1 tablespoon baking powder
1/2 teaspoon baking soda
1 teaspoon table salt
2 tablespoons vegetable shortening , cut into 1/2-inch chunks
8 tablespoons unsalted butter (1 stick), cold, lightly floured and cut into 1/8-inch slices (see illustration below)
2 tablespoons unsalted butter , melted
1 1/4 cups low-fat buttermilk , cold

1. Adjust oven rack to lower-middle position; heat oven to 450 degrees. Whisk flour, baking powder, baking soda, and salt in large bowl.

2. Add shortening to flour mixture; break up chunks with fingertips until only small, pea-sized pieces remain. Working in batches, drop butter slices into flour mixture and toss to coat; pick up each slice of butter and press between floured fingertips into flat, nickel-sized pieces (see illustration at right). Repeat until all butter is incorporated; toss to combine. Freeze mixture (in bowl) until chilled, about 15 minutes.

3. Spray 24-inch-square area of work surface with nonstick cooking spray; spread spray evenly across surface with kitchen towel or paper towel. Sprinkle 1/3 cup of extra flour across sprayed area; gently spread flour across work surface with palm to form thin, even coating. Add all but 2 tablespoons of buttermilk to flour mixture; stir briskly with fork until ball forms and no dry bits of flour are visible, adding remaining buttermilk as needed (dough will be sticky and shaggy but should clear sides of bowl). With rubber spatula, transfer dough onto center of prepared work surface, dust surface lightly with flour, and, with floured hands, bring dough together into cohesive ball.

4. Pat dough into approximate 10-inch square; roll into 18 by 14-inch rectangle about 1/4 inch thick, dusting dough and rolling pin with flour as needed. Following illustrations below, using bench scraper or thin metal spatula, fold dough into thirds, brushing any excess flour from surface; lift short end of dough and fold in thirds again to form approximate 6 by 4-inch rectangle. Rotate dough 90 degrees, dusting work surface underneath with flour; roll and fold dough again, dusting with flour as needed.

5. Roll dough into 10-inch square about 1/2 inch thick; flip dough and cut nine 3-inch rounds with floured biscuit cutter, dipping cutter back into flour after each cut. Carefully invert and transfer rounds to ungreased baking sheet, spaced 1 inch apart. Gather dough scraps into ball; roll and fold once or twice until scraps form smooth dough. Roll dough into 1/2-inch-thick round; cut three more 3-inch rounds and transfer to baking sheet. Discard excess dough.

6. Brush biscuit tops with melted butter. Bake, without opening oven door, until tops are golden brown and crisp, 15 to 17 minutes. Let cool on baking sheet 5 to 10 minutes before serving.

Pecan-Crusted Chicken

Pin It
I'm a wee bit obsessed with the recipes from Cook's Illustrated.  They have a proven track record in our home.  They have a sister publication, Cook's Country, which seems to print simpler, homey, more family-friendly recipes as compared to Cook's Illustrated. I haven't tried a lot from them, but this pecan-crusted chicken recipe is wonderful.

Pecan-Crusted Chicken
(Cook's Country)
  • 2 large eggs
  • 4 teaspoons Dijon mustard
  • 3 garlic cloves, minced
  • 2 teaspoons dried tarragon
  • Salt and pepper
  • 4 boneless skinless chicken breasts, halved horizontally (about 1/2 inch thick each)
  • 2 cups pecans
  • 2 slices hearty white sandwich bread, torn in pieces
  • 4 teaspoons cornstarch
  • 1 tablespoon dark brown sugar
  • 1/8 teaspoon cinnamon
  • 1 cup vegetable oil
  • 1.  Adjust oven rack to middle position and heat oven to 250 degrees. Line rimmed baking sheet with wire rack. Whisk eggs, mustard, garlic, tarragon, 1/2 teaspoon salt, and 1/2 teaspoon pepper in large bowl. Add chicken, coat well, cover with plastic wrap, and refrigerate while preparing nut mixture.

    2.  Pulse pecans in food processor until finely chopped, with some pebble-sized pieces. Transfer to pie plate or shallow rimmed dish. Pulse bread in food processor until finely ground. Add bread crumbs to nuts and stir in cornstarch, brown sugar, 1/2 teaspoon pepper, 1/4 teaspoon salt, and cinnamon.

    3.  Working one at a time, remove cutlets from egg mixture, letting excess drip back into bowl. Thoroughly coat chicken with nut mixture, pressing on coating to help it adhere, and transfer to large plate.

  • 4.  Heat 1/2 cup oil in large nonstick skillet over medium-high heat until shimmering. Place 4 cutlets in skillet and cook until golden brown on both sides, 3 to 4 minutes per side (lower heat if crust is browning too quickly). Transfer chicken to rack on baking sheet and keep warm in oven. Discard oil and solids from skillet and repeat with remaining oil and cutlets. Season cutlets with salt and pepper and serve immediately.

    This recipe freezes beautifully.  I make them ahead through Step 3 and then flash freeze the breasts.  On cooking day, I defrost in the fridge, and continue on with Step 4. 

Saturday, March 12, 2011

Great Garlic Gadget

Pin It
We love garlic.  My family often jokes that everything we eat has garlic in it.  That's not necessarily true, but not entirely wrong either.  We really love garlic.

I've tried out a couple garlic gadgets before, only to be disappointed.  The first was when I bought the Zyliss Jumbo Garlic Press.   Great reviews.  Sturdy product.  The only problem was that while the gadget could handle the larger cloves, my arthritic hands could not produce the extra power needed to squeeze the larger press.  That item was re-gifted.

The next gadget we tried was the Chef'n Rolling Garlic Chopper.  It was intriguing.  I don't always want garlic pressed.  Sometimes I want it chopped.  But I had a bit of trouble getting the garlic out of the contraption.  The old-fashioned knife came back out.

So, I was a bit leery when I heard about these plastic tubes that peeled garlic.  I was curious enough to put it on my Amazon wish list in case someone out there noticed and bought one for me.  Yeah, that didn't happen.

Last week, I was ordering from Amazon, but needed to add a small item in order to get free shipping.  I looked at my wish list, and put the garlic thing-a-ma-jig into my cart.  Pressed order without looking back.  Would I regret it?  Had I just wasted $9 on something that would end up at Goodwill?

No-sir-ee-bob!  (Please tell me I'm not the only one to use silly little sayings like this.  Pleeeeease!!!)

I'm soooooo happy to report that the Zak Designs E-Z Rol Garlic Peeler is THE BOMB!  Seriously.  You put a clove in the tube.  Press down (slightly), roll back and forth a couple times until it crinkles.  Take out the clove and voilà!!   IT'S PEELED!!!  How frickin' easy is that?!

I was so excited about this little doo-hickey that I recorded this little video showing how the thing works.  It's low budget, and very brief.  Just enough so you can see how absolutely easy this thing is.
OK, I sound like an infomercial. I know it.  But I really can't stress enough that if you use garlic regularly, you NEED this gadget.  NEED.  Yep, I said it.  Go get one now.  You won't be sorry.

A Thing of Beauty

Pin It I need to introduce you to my new best friend:  Beauty.  Beauty is my new upright freezer.  I planned on naming her Betty, Joy, Martha, or some other feminine food-related name.  In the end though, I found myself saying, "Hello, Beauty," every time I passed her.  So, Beauty it is.

I've been dreaming of Beauty for years.  Yes, years.  I never really thought she'd be a reality because of 1) the cost, and 2) the space.  We already have a second fridge in our organized-but-jam-packed garage.  I just didn't see a spot.

A couple months ago, I started looking at the space differently.  When you walk into the garage, there was a shelving unit filled with board games right in front of you.  Behind the shelves, was our second refrigerator.  With K getting older, I started realizing that many of these games hadn't been used in years.  I took them all down, and got rid of half our games.  Some went into our coat closet, a few went to K's room, a few to friends, and the rest to Goodwill.  With that shelving unit gone, there was now room for an UPRIGHT FREEZER.  WHOHOOOOO!!!!


I started looking around.  Read my Consumer Reports.  Debated between frost-free models and manual defrost models.  Lots of pros/cons for both. Ended up with a frost-free Energy Star rated one from Sears.  There was a Frigidaire model in competition too, but the price on the Sears model sealed the deal.   

Beauty arrived on Superbowl Sunday, just before our guests.  I couldn't wait for the game to be over.  The organizing bug was in me and was begging to come out!

I sketched and planned.  I bought some new plastic bins and labeled them.  I've cooked batches and batches of food.  I've sucked and sealed bags galore.  I bought a quarter cow.  The freezer is now full...full of pre-made meals that will make busy work day meals a dream.

Looking back at my organized freezer pics pre-Beauty, I'm amazed at how little room I actually had.    There was never room for seasonal/holiday foods.   There wasn't room for much variety.  No room for an extra bag of ice.   All that has changed!


Before Beauty:  The kitchen freezer

The kitchen freezer now has four plastic bins just for vegetarian food.  It also has a section for breakfast foods, and ice.  The door holds a whole row of juice cans.  Ice packs and yeast are on the lower door shelf.  The outside freezer (above the fridge) has berries in the door, and is waiting for the quarter cow to fill it up!

Lasagna with Pesto

Pin It
How did we ever live without pesto?  And why did it take us 25 years to learn about it?  We were introduced to it at a Bloomington, Indiana restaurant we used to frequent.  Just simple pesto and pasta, but oh, so good!  That was back in the early 90s.   Turning to my can't-live-without cookbook, San Francisco Encore, I've been making pesto ever since.  
And, along with that recipe for pesto was another recipe which has been a favorite of ours for nearly 20 years:  Lasagna with Pesto.  This recipe calls for lasagna roll-ups, which is a fun way to present lasagna.  You could just as easily place the lasagna noodles flat in the pan.  But I love the ruffled edges of this dish, so I've always rolled them!


Lasagna with Pesto (San Francisco Encore)

1 lb ricotta cheese
1 ½ C freshly grated Parmesan cheese
1 C shredded mozzarella cheese
½ C minced fresh parsley
½ C minced green onion
½ tsp minced garlic
1 egg yolk
1 tsp dried basil
½ tsp marjoram
salt to taste
freshly ground black pepper

1 pound lasagna, cooked, rinsed in cold water and drained.
Pesto Sauce (see below)

Preheat oven to 350 degrees. Grease a shallow baking dish. Combine all the ingredients except noodles and Pesto Sauce. Blend well. Taste and correct seasonings. Spread some of the filling over each lasagne noodle. Roll up jelly-roll fashion. Stand vertically in the baking dish in a single layer. Spoon Pesto Sauce over the top of each roll. Cover and bake for 30-40 minutes, or until bubbly and heated through. Serve immediately.

To freeze:  I have two ways to freeze this.  One way is to make the filling and simply freeze it before you  assemble the lasagna.  This is simple, but requires more work later.  

The second way to freeze it, is to partially cook the noodles so they're still pliable enough to roll, but not quite al dente.  Line the pan with foil, assemble the lasagna, and then flash freeze the whole pan.  Once frozen, remove from dish (still in foil) and place in a freezer bag.  Remove air or vacuum pack.  To reheat, defrost, remove from bag, place back in same pan, and cook as directed.


Pesto Sauce


2 C fresh basil leaves (or 3 T dried)
½ C olive oil
2 TB pine nuts
2 cloves garlic
1 tsp salt

½ C freshly grated Parmesan cheese
2 TB butter, softened

In a food processor or blender, combine the first 5 ingredients. Transfer to a bowl. Beat in the cheese by hand, incorporating evenly. Beat in the butter.

To freeze the pesto, they recommend doing freezing it without the butter and Parmesan, and adding those in just before using it. However, I will admit that I have frozen this pesto without these ingredients, and with the butter and Parmesan. I haven't noticed much difference, so I just freeze the whole recipe!