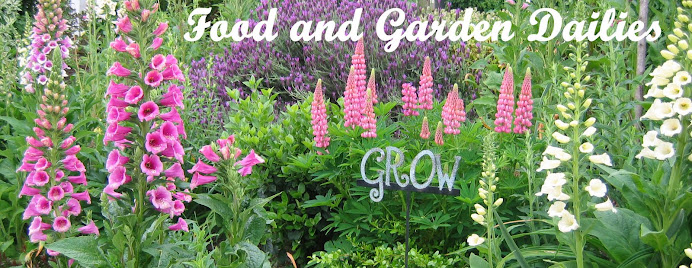
Food and Garden Dailies started as a way to record my family's favorite recipes. It has come in handy many times when I'm asked for a recipe. I simply email a link to the blog! But I couldn't just stick to recipes. The kitchen is tied to the garden in so many ways...and so I let you into my ever changing garden as well.

If you're interested in my all-time favorite recipes, check out this post first: My Favorite Recipes

Thursday, July 19, 2007

The birds are gone...

Pin It
Earlier in the week, one of the birds (assuming it was one of the parents) was chirping away in the house while the other parent flew in with food. This went on for about three or four days and nights. Yesterday was the first day I didn't hear or see them at all. I was hoping to get a peek of one of the babies, but that never happened. I just hope that one of the neighborhood cats didn't get them, as I have caught them in our yard near the birdhouse on a few occasions. And yesterday I did find a litte fluffy feather (from a baby??) on the ground.

Hopefully they'll be back again next year.

Wednesday, July 18, 2007

The best screen door ever....

Pin It We have never had good luck with screen doors. They get off track, get bent, or get stuck. We've never had a screen door that simply glides open. Right now, we have two broken screen doors in our garage, ready to go in the trash.

For awhile we were just leaving the back sliding door open, but two many flies, bees, and bugs found their way in.

A couple weeks ago Brian brought this home! It's a screen that attaches to your door frame with a tension rod, and some super sticky tape. You simply walk right through the two panels. It closes by itself with the help of a couple strong magnets. Smart. Very smart! And not too pricey either. Brian picked it up at Lowe's for about $40.

I LOVE it! The dog can now let himself in and out (no, we don't have a doggy door). The kids never forget to close the door. It's great for parties, when people are going in and out.

It's called the BugOff Screen. You can find out more here.

Tuesday, July 17, 2007

The first sunflowers...

Pin It They're here! The sunflowers are starting to bloom! They are so cheery and bright. I just love having them in the yard. I can't believe that last year was the first year I planted them in the garden.

This year I bought several packs...all different varieties. I planted them at the back of the vegetable bed, all along the northern perimeter of the front yard, and in the north-western corner of the backyard where the evergreens are still so small that a lot of sun reaches that spot. Even so, only a small percentage have survived.

In the backyard corner, I must've planted 30-40. Only about 5 are still going. In the front yard, the same thing happened. Along the vegetable bed, however, there are plenty growing. The flower above is from that bed.

Monday, July 16, 2007

The Good, the Bad, and the Ugly.

Pin It


Above you can see the good little spider that eats mites and other creepy critters. Unfortunately it's no match for the bad (also ugly) slugs that devour the pretty plants, making them ugly.

Yes, we live in fertile nursery land where amazing plants grow. However, the weeds can be equally prolific if not controlled frequently (I weed daily). Also in abundance are the slugs. Oh, the slugs LOVE Oregon. They can destroy a plant overnight. I've tried slug bait, beer bait, salt, slicing and dicing, and more. In the end I've pretty much given up. They are here to stay. I figure the only way to beat them at their game is to put in more plants. I figure the more plants there are, the more spread out their damage will be. Will this work?? Who knows.

Sunday, July 15, 2007

For the love of fuschias...

Pin It Fuschias seem to do very well here...at least when I see them in other people's yards. Each year the nurseries offer these gorgeous 15" hanging baskets of fuschias. There are so many varieties it's hard to select just one. Fuschias need a lot of shade, which is one thing our yard doesn't have much of.

Each year I purchase one and tuck it in the far south-western corner of the yard where it is totally protected by the fence from the south-western sun. I water them at least once a day, but have never had one last more than a couple weeks. Others in town are prospering. I suppose I just need to just accept that I have a black thumb when it comes to fuschias. Here's a picture of this year's fuschia, which will be going out in tomorrow's trash:

In addition the the pre-made basket, I also purchased some small fushia plants: trailing and upright. I tucked three plants into these little baskets that hang on the side of our shed. Well, wouldn't you know it...they are flourishing! It's now mid-July, and we've had weather over 100 degrees. They're still going... So, maybe next year I will completely give up on trying to make one of the pre-made baskets survive, and just stick to the little nursery plants. They seem to like it here!

Saturday, July 14, 2007

Potstickers

Pin It Last summer we had a 14 year old Chinese exchange student (Ying Hong) staying with our family for a few weeks. One night we made a Chinese dinner together. She made most of the dishes, and they were delicious...nothing like you'd order from an American Chinese restaurant. We also invited two Chinese college students to the dinner. MY contribution to the dinner was Potstickers, which were just as popular as the dishes Ying Hong made.

When I make these, I usually make a couple recipes and freeze them. If you flash freeze them they won't stick together when you take them out of the freezer. It makes it really easy to cook up a small amount, saving the rest for later. To flash freeze, place a single layer of uncooked dumplings (potstickers) on a jelly roll pan. Freeze them until hard, and then transfer to a freezer bag.

Chinese Potstickers
(San Francisco A La Carte)

2 packages (100 total) round potsticker wrappers

Core and chop finely:
1 pound Chinese cabbage*

Sprinkle over cabbage:
2 t salt (Let this sit out for one hour, then press through a strainer to drain any extra water.)


Let the cabbage sit for one hour. Place it in a strainer, and press out the water. (Hands work best for this.)

Mix together and set aside:
1 ½ pounds ground pork
3/8 C soy sauce
6 green onions, minced
1 TB sesame oil
2 TB peanut oil
½ tsp fresh grated ginger
1 egg
2 cloves garlic, minced

When the cabbage is ready, add it to the mixture above.

To assemble: Fill a small bowl with water. Place a potsticker wrapper on your work surface. Place about 1 tsp of the filling in the center of the wrapper. Dip your (clean!) finger in the water, and run it along the edges of the wrapper. Fold in half, and pinch it closed. Make sure you don't leave any little spaces for the filling to escape. Keep going until all of the meat mixture has been used. (You can
freeze any left-over wrappers.)

Heat in a skillet:
2 TB peanut oil**

Line up the potstickers around the edge of the pan, with the seam side up. Saute them for about 2-3 minutes (medium heat), keeping them from burning.***

Add to the pan:
1/2 C water

Cover the pan, and let them steam for about 20 minutes.

Serve hot with Potsticker Sauce.

*I've used "regular" cabbage in a pinch, when I couldn't find Chinese cabbage. It works just fine!

**I do recommend using peanut oil instead of canola (which I usually use for things like this) as it has a much higher burning point....meaning you can cook with it at higher temperatures than other oils. Our sautee pan was splattering because it was so hot! I wanted to turn it down, but Ying Hong said that's how it was supposed to be done.

***Instead of sauteeing/steaming them like the recipe called for, Ying Hong told me to steam them first (she boiled them until they were firm, but done) and then sautee them. She said you could eat them steamed or sauteed. Just don't steam them so long that they break apart and lose the filling.

Now for the sauce. My favorite potsticker sauce came from a Chinese restaurant in Bloomington, Indiana. Since then, I haven't found anything close that I like. Until, I combined a couple recipes to come up with this unique recipe:

Potsticker Sauce

In a small bowl, microwave for 30 seconds:
1/4 C jalapeno jelly (Safeway sells this in a gourmet jelly display)

Add:
2 TB soy sauce
2 TB water
½ tsp rice vinegar
1 ½ tsp minced garlic
1 tsp minced fresh ginger

This recipe is a sweet Asian dipping sauce with a spicy kick!

Thursday, July 12, 2007

10 things I love about our backyard...

Pin It
  1. There's not a lot of grass. Just enough to add some green expanse to the yard. Just enough for a Slip 'n Slide.
  2. The 2 plum trees. They were there when we moved in, and are the only things we kept from the original owners' partial landscaping. The trees are decorative flowering plums which are gorgeous in the springtime. Bright pink blossoms all over. Though they are ornamental, every couple of years we seem to get a great crop of plums from them. This is one of those years. Tiny little plums are plentiful, and should be ready sometime in August. They're not the big juicy ones (like my favorite black plums) but have great flavor. The trees are big and full, providing part of our yard from some much needed shade. I only wish they were planted in the southwestern corner (rather than the northwestern corner) so we could get even more relief from the hot southwestern sun that beats down into our yard in the late afternoon.
  3. The yellow butterfly-bush. I just think it's cool. Most are purple or white. Mine's a beautiful shade of yellow.
  4. The herb garden: lavender, sage, oregano, chives, basil, thyme,curry, parsley, rosemary, dill, cilantro, lemon balm, and much, much more! I love looking out of our family room windows into the herb garden. And, I love walking through it on the stepping stones that Katie and I made.
  5. Our "wildlife". I am so not a bird person. However I must admit I get so excited every spring when our tree swallows find their way back to one of the birdhouses that is on our fence. I bet you're wondering why I have birdhouses if I'm not really a bird person. A local woman sells these adorable hand-painted bird houses at our farmers' market every summer. I just loved them, and put them up for decoration, never thinking that anything would make its home in one of them. Well, sure enough....the little swallows call it home. Usually there are three of them that fly around the yard, perching nearby, going in and out for months making a nest. This year we definitely have babies in the house. If you get close enough you can hear the little chirps. They must be tiny, as the eggs are as small as a Jelly Belly. In addition to the birds, we also have a few garter snakes. At first they kind of freaked me out. After living peacefully with them for a few years, I actively look for them when I'm working in the yard. They keep their distance and slink away when they see us. This picture shows one of them under our patio table last week.
  6. Our hammock. Unfortunately it is in need of some repairs so is out of commission this summer. But it is so peaceful to lay in the hammock, listening to some music on a warm breezy day. It helps that the hammock is surrounded by colorful, fragrant flowers.
  7. "Sultry" roses. Kind of a peachy yellow blossom that I just "had to have". I love the color against the blue house. Though I love the roses, I could do without the blackspot and aphids...
  8. Flowers in canning jars. The garden flowers are so plentiful that I can create several bouquets each week. Sometimes I use an actual vase. More and more I find myself simply putting them in a canning jar. I LOVE that when I need a quick gift, I can grab acanning jar and fill it with flowers.
  9. Seats. Lots of seats. Two tables with umbrellas for dining out and entertaining. These get used a lot. About 20 more stackable green plastic chairs for larger parties. And a simple three person canopied swing that sits between the plum trees. A GREAT place to read a book!
  10. HUGE Alaska Shasta Daisies. They must love the spot they're in, as they get about 5 feet high, and 3-4 feet wide. I have to stake them and keep them tied loosely together, otherwise they flop over onto the lawn.

Wednesday, July 11, 2007

Pesto!!

Pin It Pesto! We LOVE pesto!! And basil is now ready for picking, at least here in the PNW. Sadly, our own little basil crop is pretty measly. I planted 11 plants in May and only two are still alive. And they're just as small as they were when they were planted. They're in a sunny spot with all the other herbs (which are flourishing). So, I'm buying a bit each week from the local Farmers' Market.

Our pesto recipe comes from one of my favorite cookbooks, San Francisco Encore. This cookbook, and its companion, San Francisco A La Carte, are owned by nearly everyone in our family. Every recipe has been a true winner. This one for pesto is no exception.

Pesto Sauce


2 C fresh basil leaves (or 3 T dried)
½ C olive oil
2 TB pine nuts
2 cloves garlic
1 tsp salt

½ C freshly grated Parmesan cheese
2 TB butter, softened

In a food processor or blender, combine the first 5 ingredients. Transfer to a bowl. Beat in the cheese by hand, incorporating evenly. Beat in the butter.

To freeze the pesto, they recommend doing freezing it without the butter and Parmesan, and adding those in just before using it. However, I will admit that I have frozen this pesto without these ingredients, and with the butter and Parmesan. I haven't noticed much difference, so I just freeze the whole recipe!

Tuesday, July 10, 2007

Summer Garden (Front Yard)

Pin It
One of the first things that attracted me to McMinnville were these huge flower baskets all over town. They line the streets, parking lots, schools, etc. Even our industrial area has them on display! As soon as the weather is warm enough (early-mid May) I head down to my favorite basket nursery and purchase three for our home. Two matching ones go in the front, on each side of our front window. The third one goes in back. It's visible from our living areas (kitchen, family room). I just love these!!

Summer is in full swing here, and so is the garden! Although I must say some areas are doing better than expected and others...well...not so much...

Here's a peek at our front yard on the left of the driveway. Everything here was planted last summer, so there's still room for it all to grow and fill in . Some of the plants are still quite small, but all are doing well.

My favorite part of the front yard is the side patio we built on the upper right side of the house. There are steps leading you from the driveway up to the patio. Brian and I love to sit and chat or read at the little table. Toward the back are some raised garden beds. The large one on the right is waaaaaaaay too crowded, and desperately needs to be thinned so the tomato plants and other veggies will kick into high gear. Last year I spread perennial flower seeds throughout this bed, with the intention that I would transplant the flowers to the front and backyards. While I have moved hundreds of plants already, I think there are at least a hundred left that really need to find a new home. Eventually this will be an all fruit/veggie bed....tomatoes (cherry, Roma, pear), broccoli, cucumbers, snap peas, strawberries, rhubarb, lettuce, etc. For now, it's just plain crowded!


Copyright laws.

Pin It
Copyright laws. After posting the first two recipes I thought I needed to do a little research in this area. After all, I don't want to infringe on any, or get into any trouble! The US copyright office says, "A mere listing of ingredients is not protected under copyright law. However, where a recipe or formula is accompanied by substantial literary expression in the form of an explanation or directions, or when there is a collection of recipes as in a cookbook, there may be a basis for copyright protection. Note that if you have secret ingredients to a recipe that you do not wish to be revealed, you should not submit your recipe for registration, because applications and deposit copies are public records."

So, to stay above board, I will only be posting favorite recipes (really had no plans to just publish a ton of random ones anyway!), listing the ingredients, directions, and my own personal thoughts.

Monday, July 9, 2007

Easy Potatoes

Pin It This is a simple, quick potato side dish that I like to make when I'm in a hurry. We don't always have a side dish for dinner. Often just the meat/main dish and salad/veggies. That fits in with our casual living. But, when the meal calls for it (tonight we were having Mesa Verde Flank Steak from Entree Vous...YUM!!!), these potatoes do the trick:


Roasted Garlic & Rosemary Potatoes
(Pampered Chef)

Preheat oven to 450º.

In a bowl, mix together:

2 lbs red potatoes* (4-5 large), unpeeled. Cut in half, and then into 8 wedges (4 each half)**
2 cloves garlic, crushed
½ cup fresh grated Parmesan cheese
1 TB dried rosemary, crushed
½ tsp salt
1/4 cup olive oil***

Spread in a single layer on a bar pan (LOVE the stoneware bar pan!!)
Bake 10 minutes, and then turn potatoes.
Continue baking another 10-15 minutes or until light golden brown and tender.

6 servings. Each serving: Calories: 220, Fat: 10 g, sodium: 260 mg, fiber: 2 g

*I don't always have red potatoes on hand. In fact, I never do. I will buy them when I specifically need them for a recipe. But I do usually have a bag of Idaho/baking potatoes in the pantry. That's what I used in the photo above. And they turn out just fine.

**To cut the potatoes into wedges I use an apple corer/slicer thingy. First I cut the potatoes in half (cut the short center, not the end to end length). Then I place the potato on a cutting board, flat part down, pressing down with the slicer. I chop the middle cylinder piece in half (cooks through better) and toss them in the bowl. Faster than using a knife, and less equipment to wash than a food processor.

***No need to add more oil if you add more of the other ingredients. It makes it a little greasy if you do.

Berry Time!

Pin It Two things I love to share are recipes and things from the garden. So each day I'm going to share at least one of these with you.

Right now it's high berry season in the Pacific Northwest. We're at the tail end of strawberries (but don't worry...we froze some!) and just getting into blueberries, marionberries, and raspberries. YUM!!! We've been buying frequently from local fruit stands.

Last week I canned some jam (mixed berry, strawberry, blueberry, raspberry) with my friend Nikki. This morning my mother in law called and we started talking about berries and jam. Turns out I had 1 1/2 flats of mixed berries that needed to be eaten, canned or frozen ASAP. She was interested in making jam, so she came over to make a batch with me. I let her choose the combination, and we made a very yummy jam with blueberries and marionberries. I'm not sure she'll be canning any time soon (it is a precise, time consuming process), but I do see her making some freezer jam in the near future...

Here's what we made today:

Later, I made a batch of strawberry/rhubarb jam. It's not something I've ever tried before (as a jam) but who can resist that combination??? I had some rhubarb in the garden, and quickly prepped it for the jam.

We now have more jam than we'll need for the coming year, so I prepped the rest of the berries for freezing.

Before I froze them all, I quickly made up this cobbler that I've been dying to try. I actually made it for our 4th of July pot-luck. However, I made the mistake of doubling the recipe (including the melted butter at the bottom of the pan) and the texture was all wrong. It was a tasty, but gunky mess. So I wanted to test out a single recipe of it. This time we hit the jackpot. It is, quite frankly, the best cobbler I've ever made. I'm tossing out the other recipes and sticking to this one.

Which leads me to the Daily Recipe: Berry Cobbler!

The recipe is from Cook's Illustrated (July 1996), a cooking publication which is my current favorite. (They adapted the recipe from New Southern Cooking (Knopf). )I love how Cook's Illustrated tells you why things work the way they do. I only wish they'd told me not to double this recipe without reducing the butter!!

Fruit Cobbler with Batter Topping
Serves 4 to 6

6 tablespoons unsalted butter
3/4 cup all-purpose flour
3/4 cup sugar , plus 1 tablespoon
1 teaspoon baking powder
1/4 teaspoon table salt
3/4 cup milk
2 cups fruit or berries*, sliced (not sweetened or thickened)

1. Adjust oven rack to lower-middle position and heat oven to 350 degrees. Put butter in 8-inch square or 9-inch round pan; set in oven to melt.
2. Whisk flour, 3/4 cup sugar, baking powder, and salt in small bowl. Add milk; whisk until just incorporated into dry ingredients. When butter has melted, remove pan from oven. Pour batter into pan, without stirring it into butter, then arrange fruit over batter. Sprinkle with remaining tablespoon sugar. Bake until batter browns, about 40 to 50 minutes.

* I used equal amounts (approximately) of strawberries, raspberries, blueberries, and marionberries. Tasty combo!

Enjoy!!

Welcome!

Pin It Welcome to my little corner on the web. Each day I'll share a bit of my garden and some of my favorite recipes right here. So check back soon and let me know what you think!